My tumour

Wow the past few months have been a bit crazy for me. I was diagnosed with a tumour.

The good news is, it’s not cancer. I am so greateful for this. My tumour is large, about the size of a small eggplant. It’s an endometrioma, caused from uterine tissue escaping during my C-section.

I’ve had pains since a couple weeks after my daughter was born. As the years have progressed the pain has intesified. My daughter is five now and when the pain comes I can barely move. My pain is cyclic and lasts about a week or two each month. The rest of time I can do what I like within reason. If I push my body too far the tumour pain comes.

I am a weightlifter and even through the pain and the fear that this has brought me, lifting weights helps me keep my mind in the right place. On one of my lowest days I did a 405 pound yolk walk. (If you’re not sure what that is, you can Google the Strong Man event.) Lifting more than 400 pounds reminded me how strong I am and rid myself of the doubt I was feeling.

At the beginning of this journey I was told I had cancer by my family doctor. I was told to prepare for chemotherapy and surgery. I was told I would be getting a chest X-ray to ensure my cancer hadn’t spread.

These were terrifying words. My world stopped and all I could think about was my daughter. The little girl who looks to me for everything. I think any mother would feel the same way. I am a single mother and I felt this made my situation worse. Not only was I faced with my own mortality, but now thinking about what would my daughter do without me?

Worst feeling ever.

I got the “cancer diagnoses” in the morning on a work day.  I cried, went to an alternative health clinic for support from friends, and then went back to work.

I decided I would be the tough girl who could take what ever life would throw at me. I’d rather go back to work than sit home alone and wallow.

My friend, Danielle, was by side the whole day reminded me how strong I was and that I could dead lift 275 pounds. She was talking about how I could look forward to hitting a 300 pound dead lift for a new PR (personal record). Still haven’t hit that mark.

Later that day I was in a cancer surgeon’s office who felt my tumour and told me she didn’t think it was cancer. She thought it was a desmoid tumour. (That’s a Sarcoma that doesn’t spread.) It’s better than cancer, but still a pretty rough surgery and is treated with chemotherapy and radiation.

It took three months, two ultra sounds, a CT Scan, two biopsies and lots of sleepless nights before I was given the correct diagnoses of a benign Endometrioma.

Through this experience I feel stronger than I’ve ever been, it’s made me a better mother and friend and I have more appreciation, compassion and empathy for those who have been given scarier diagnoses than myself.

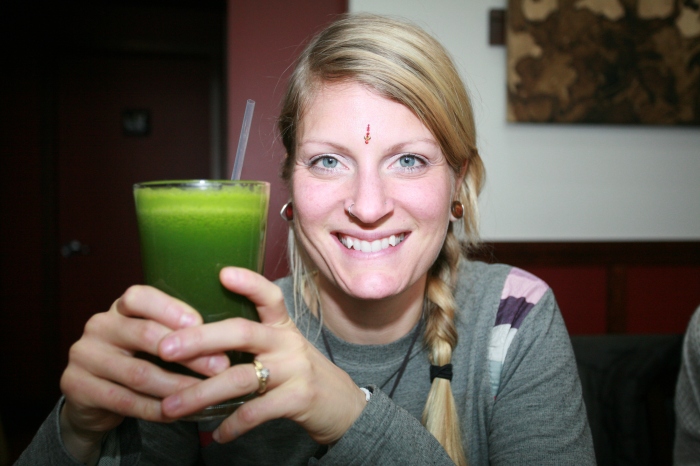
Meet raw food chef: Danielle Arsenault

IMG_2163

Danielle Arsenault has been around the raw food block.

She’s a raw food chef and educator who’s studied at both the Anne Wigmore Institute in Puerto Rico  and at the Raw Foundation in Vancouver, B.C.

Even before going raw she’d co-written four gluten-free vegan cookbooks selling all 4,000 printed copies.

Her love for the kitchen began when she spent several years living abroad. She lived in Mexico and South Korea teaching English and found it difficult to find vegan food.  She explained there were always ingredients such as lard or fish sauce added to what seemed like a vegan option.

With what felt like no other options, Arsenault headed into her own kitchen and began to experiment making her own delicious vegan-friendly foods. When her passion in the kitchen was ignited, she began to take a deeper look into nutrition and this is where she first began to learn about raw foods and how powerful they can be.

“I have found raw food to be the most healing diets I have come across,” said Arsenault. “I want to share with people the ability to heal themselves.”

Now she runs her business Pachavega Living Foods Education, with her motto “Organic plant-based education to heal your body and ignite your spirit.”

The chef explained she keeps the word “raw” out of her business name so she doesn’t scare people away for fear of the unknown.

She uses her raw food knowledge, skills and passion to help other people find health and balance in their lives.

She seen people clear up acne, come off diabetic medicine and even use raw food to help heal from cancer.

“Whether it’s hypertension, diabetes, cancer or depression, I fully believe it’s all alleviated with raw foods,” Arsenault  said. “I am not a doctor so I can’t use the word cured, but I’ve done tonnes and tonnes of research.”

When Arsenault  decided she wanted to learn more about raw foods she travelled to the Anne Wigmore Institute in Puerto Rico in Aug. 2012.

“It was amazing and it changed my life,” she said. “It was then I decided to be 100 per cent raw. Before going to the institute I was at least  50 per cent.”

She stayed 100 per cent raw for more than a year. Now she hovers around 80 per cent raw in the winter and 100 per cent in the summer.  If she is going to choose to eat cooked food it’s often sprouted brown rice, quinoa, yams, broccoli or butternut squash.

“People need to stay away from packaged and processed foods,” Arsenault said.

When it comes to being a raw foodist living in a cooked food world, Arsenault explains, “I’ve had to accept that people are just going to eat what they will. Instead of fighting it I want to inspire them.”

While she’s never had health issues of her own, Arsenault  credits her healthy habits to keeping her in tip top shape.

“I’ve got unlimited energy,” Arsenault  said.

Fermented foods also play a key role in Arsenault  diet. She brews kombucha and water kefir as well as making her own fermented nut cheeses and krauts.

The 32-year-old avid rock climber is picking up from Victoria, B.C. and moving to Canmore, Alta. in May. She’ll be living in the Rocky Mountains and will be teaching a raw food chef certification and nutrition course.

“I am a certified whole food nutrition and life coach,” she explained. “I also have a master’s degree in education.  My passion is education. I never wanted to make food for people I want to teach them how.”

For more information or to contact Arsenault go to  pachavega.com

Danielle Arsenault  typical raw food day

Breakfast

A smoothie loaded with bananas, spinach, one date, medicinal mushroom powder and goji berries.

Lunch

A hearty salad with zucchini noodles, kelp noodles, cherry tomatoes and cucumber. She makes her own dressing with ingredients including apple cider vinegar, olive oil and garlic.

Dinner

A plate of fruit.

When she’s craving something more she will often go for raw crackers and cashew cheese or make a raw chocolate smoothie.

Celery broth mushroom raw soup

This slideshow requires JavaScript.

Here’s a super easy, delicious raw soup.

Ingredients

Celery
Parsley
1.5 cups homemade almond milk
Himalayan salt
Mushrooms
green onions
peas
corn.

1. In the juicer, juice 1.5 cups of celery and parsley.  This will be the base of your broth.

2. Add juice and almond milk in the blender with about three or four green onions and a handful of any mushroom of choice. Blend.

3. Dice up half an avocado, chop up some green onion and thaw a small handful of peas and corn.

5. Pour broth in bowls and add veggies.

So delicious.


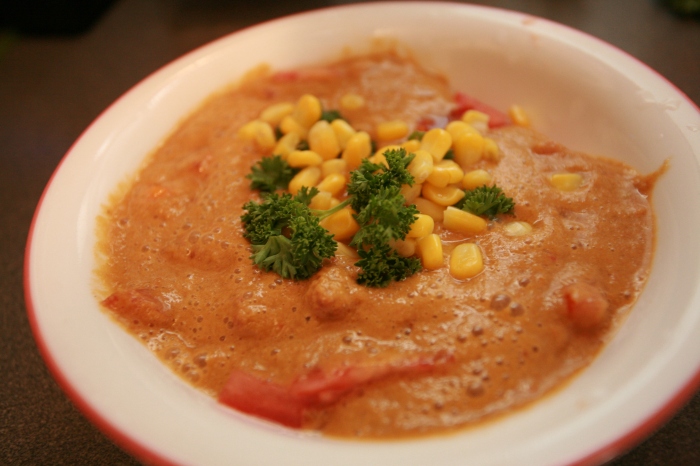
Delicious raw soup


This slideshow requires JavaScript.

OK now I can’t take credit for this soup recipe.  But I’ve been making it for years and thought I’d share it.

I found the Abeba and Anna’s It’s Really Soup! recipe in The Complete Book of Raw Food.

If you’ve never made a raw soup recipe before then this may be one to start with. I am borrowing a friend’s Blentec blender which is AMAZING!!

I can throw all the ingredients in it WHOLE and it comes out deliciously smooth.  If you are using a conventional blender you’ll want to do some pre-chopping and maybe soak the raisins too.

Ingredients
10 fresh roma tomatoes
1/2 onion
4 cloves of garlic peeled and chopped
fresh basil to taste
fresh dill to taste
two tablespoons lemon juice
Himalayan salt to taste (original recipe calls for Celtic salt)
2 tablespoons olive oil
1/8-1/4 cup raisins
1-2 red peppers
1/2 jalepeno pepper – optional (I used half a pepper)
1 cup sun-dried tomatoes chopped
1/2 cup corn
1/2 sweet yellow pepper
parsley for garnish.

Directions.

Add 6 tomatoes, onion, garlic, basil, dill, lemon juice, salt, olive oil, raisins, red pepper, jalepeno and 1/2 cup water in the blender.

Blend until smooth. The add some of  the sundried tomatoes and blend again.

In each bowl add chopped avocado, chopped romas and sun-dried tomatoes, corn and sweet pepper.

Pour blended soup over top and garnish with parsley.

Enjoy!

DIY vanilla stevia drops

This slideshow requires JavaScript.

Stevia is my sweetener of choice and I find liquid stevia is far superior to any other form.

A small bottle of stevia drops is about $16. If you opt for the cheaper brand the dropper is plastic and I think it really affects the taste.

I love making my own things and saving money so here is my attempt at making vanilla stevia drops.

I found ground stevia leaves at a local herb shop. The sweet green powder was about $4 for a cup. So I have now found the most natural and cheapest way to buy this sweetener. On its own the herb is super sweet and has a bit of a grassy flavour. I don’t mind that, but we’ll see how the tincure works out.

I have purchased several flavours of stevia drops including, vanilla, root beer, orange, caramel and chocolate. Vanilla is my favourite and most versatile.

Warning: This is an experiment, not a tried a true recipe. I’ll update this post in a couple weeks to one month and let you know how it turned out.

You will need:

Two vanilla beans (I used Mexican vanilla)
1/2 cup dried stevia leaves
375 ml of vodka (or any other hard liquor)

1. Cut the beans lengthwise and scrape out the vanilla seeds. The put the seeds and empty pods in a jar.

2. Add stevia leaves and alcohol.

3. Let sit in a dark cupboard for two to four weeks.

4. Strain mixture. I am going to fill all my empty stevia bottles with it.

Clean your oven with baking soda

This slideshow requires JavaScript.

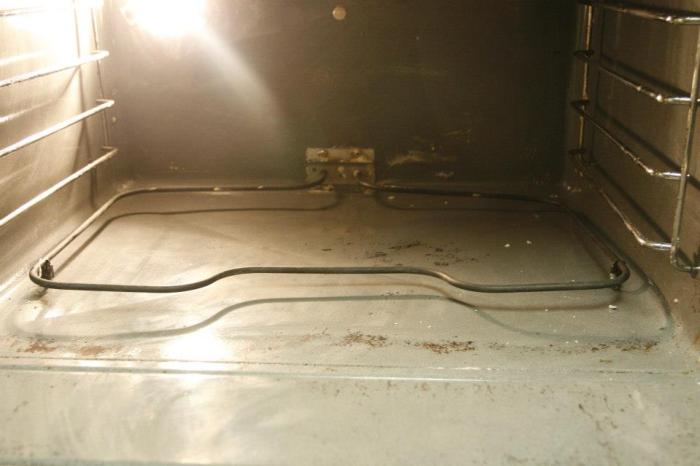
OK so A while back I decided to try cleaning my oven with baking soda. I was pretty skeptical, but it worked well. I used a scouring pad, but if I were to do this again I would use steel wool.

In my younger years I worked as a housekeeper in the Rockies and remember cleaning up to eight ovens in one day. Even with gloves on I got chemical burns on my arms.

This method works just as well but without the risk chemical burns and is safe to use in the home with children. They can even help you.

You will need:

1 cup of Dr. Bronner’s Castile soap (or whatever liquid soap you want)
3 cups of baking soda
10 drops lavender essential oil (this is only for pleasure, not needed for cleaning)
1/2 cup white vinegar
You may want to add a little bit of water to make it more of a paste.

1. Mix all ingredients and make a paste.

2. Remove the racks and coat in paste and let sit.

3. Cover the inside of the oven with the rest of the paste and let sit over night.

4. In the morning fill a bucket with warm water and scrub the oven.  It’s amazing and it works.

It’s been a long journey

Charlathennow-WEB

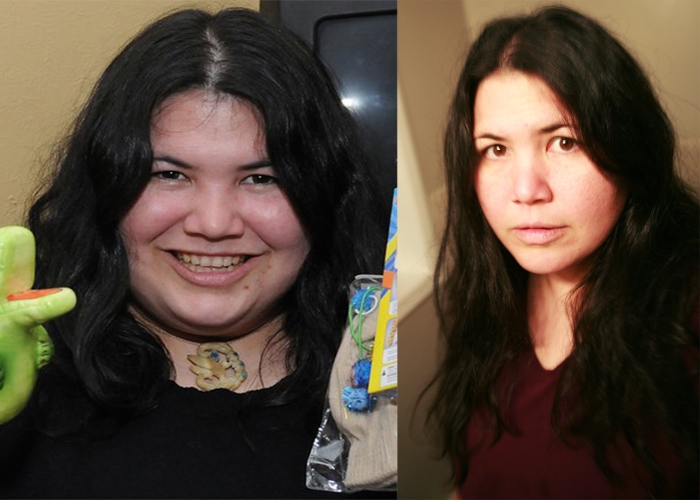
I never really imagined I could be a person posting a before and after photo. In all honesty this isn’t an after photo, it’s just a now photo.

I have more work to do and more goals to reach.

The first photo was taken about 2.5 years ago. I’ve learned a lot over this time and gained more knowledge than weight lost.

I started my journey on a raw vegan diet. I am no longer raw vegan, but still eat a lot of raw vegan dishes. I’ve learned I am sensitive to most grains and allergic to wheat.

I eat whole foods, try to buy my meat from a farmer and love fermenting all sorts of things.

I have spent the past two years working with my naturopthic doctor Dr. Kyle Morrison and CrossFit coach Dave Warbeck both with Back to Back Chiropractic Clinic. I owe a lot to these two men who have really helped me.

I love powerlifting, hiking and surprising enough to me, I’ve found a love of running.

If you have any questions I’d love to answer them.

Vegan chocolate ice cream

This slideshow requires JavaScript.

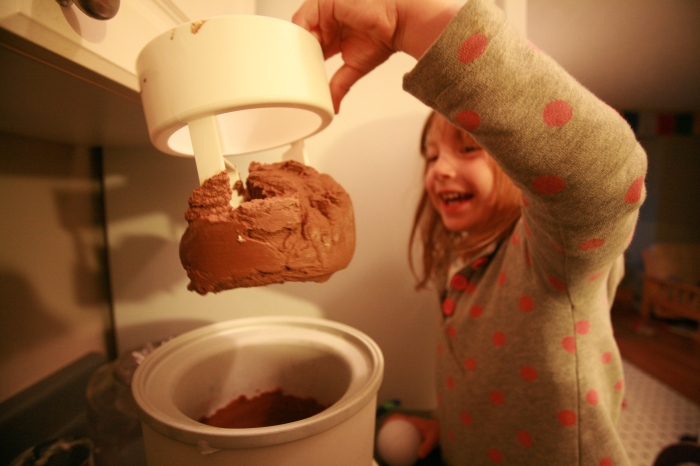
This ice cream is only three ingredients and it’s amazing. You’d never know it’s vegan and it’s super easy.

1 can coconut milk
10 pitted dates
1/2 cup water
1/4 cup organic cocoa

1. Boil the water, remove from heat and toss in the dates and cover. Let sit for about 10 minutes.
This will soften them up and make them easier to blend.

2. Put 1/4 cup of organic cocoa in a large bowl and pour in a little bit of coconut milk and whisk together. Once it’s mixed well add the rest of the can and continue to mix.

3. Take the date mixture and pour in the blender. Blend it well. Whenever I am blending hot liquids I hold a tea towel on the blender lid to protect me from a splash.

4. Once the dates are mixed well add the milk and cocoa and blend again.

5. Taste the mixture for sweetness. You can add some liquid stevia if you want a bit sweeter. Liquid stevia far surpasses the powdered form and I suggest spending the extra money for it.

6. Pour in your ice cream maker and follow its instructions. If you don’t have an ice cream maker you can pour it in a shallow pan and stir occasionally while it’s in the freezer.

Kombucha’s a brewing

This slideshow requires JavaScript.

In our home we love kombucha. It surprised me that my three-year-old would love it as much as me.

In the store a small bottle will run you about $4, and making it at home costs only pennies. The tricky part is you will need a SCOBY for the fermenting process. A SCOBY is a pancake looking thing made up of yeast and bacteria. Sounds kinda gross, but you’ll just need to get over that.

Each batch of kombucha will yield you with another SCOBY. Sometimes they are referred to as a mother and a baby.

If you have a friend who brews the stuff, they’ll gladly give you one. If not you can grow your own. I’ve done both.

To grow your own SCOBY, boil two litres of water add a couple black tea bags and stir in 1/2 cup of white sugar. Let cool to room temperature and add two bottles of unflavoured kombucha from the store.   Cover with cheesecloth or a tea towel and secure with an elastic. Let it sit in a warm dark place (like a closet) for about one month. When you have a SCOBY about 1 cm thick you are ready to brew.

Once you have a SCOBY (an acronym for Symbiotic Colony of Bacteria and Yeast) you are ready for your first brew.

A SCOBY is a living creature and be sure to treat it with care

1. Boil four litres of water.

2. Add two or three black tea bags. Note this must be plain tea with nothing added. Flavours including Earl Grey will kill your SCOBY.

3. Stir in one cup of white sugar. This is the only time we even use white sugar in my house. Don’t worry though it’s not for your body, the SCOBY eats it.  You can experiment with other sweeteners if you want. Don’t use raw honey because it’s antibacterial properties will kill your SCOBY.

4. Remove the tea bags and let the sugar tea mixture sit covered until it’s reached room temperature.

5. Pour in about 1 cup of kombucha and add the SCOBY to the top of your jar. Cover with a cloth and secure with an elastic. Put in a warm dark place and wait about two weeks.

In warmer months the fermentation will occur faster.

6. When it’s ready you’ll have a fizzy delicious beverage.

You can store it in pop-top beer bottles or jars in the fridge.

DOUBLE FERMENTING

If you want get really fancy you can add fruit juice to a finished brew. When you remove the SCOBY add some juice, maybe 500 ml to 4 litres. Cover and let sit at room temperature for two more days. Then move to the fridge. My favourite blend is apple.